How to Make a LEGO-Style AI Short Film
Set the brick look once with reference images, drop in a real photo to get a minifigure version of yourself, then direct scenes that all come out of the same toy box — and push the timeline past a single generation.
Toy-brick animation is the one style where the look has to be decided before anything else, and that single reordering is most of this guide. In a live-action short you can cast first and find the grade later. Here the grade *is* the world: plastic, studs, moulded hands, macro depth of field. Set it first and every actor and every scene is born inside it. Set it later and you are pasting a person into a toy box and hoping.
Key takeaways
- Set the project style FIRST — it is injected at the top of every prompt in the project, including the one that builds your actor.
- Reference images beat adjectives, and the panel says images alone are enough.
- A photo uploaded after the style is set comes back as a minifigure, with a full character sheet.
- Describe what happens — one or two physical actions, in order. The bricks are the style's job, not the prompt's.
- One generation renders up to 15s on Fast and Quality, 30s on Performance — a longer timeline is chained continuations, not one render.
What you are going to make
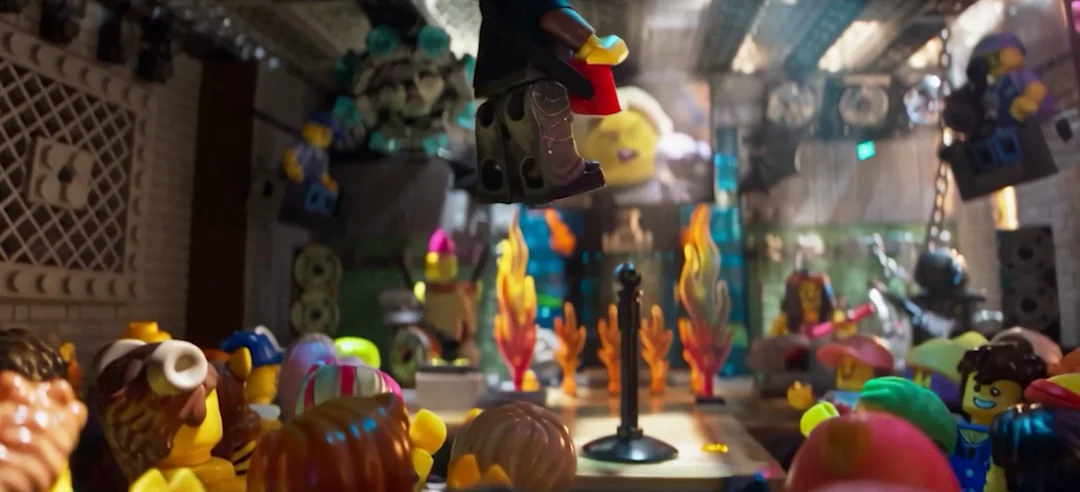
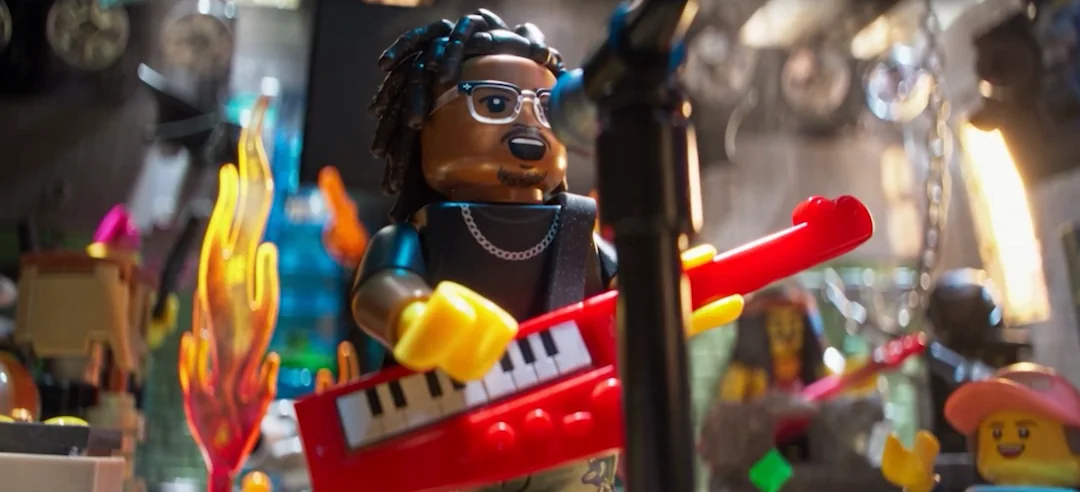
A short built entirely out of plastic: a minifigure of your own face, a brick-built stage, a crowd of moulded heads, and a scene that runs past the length of any single generation.
The stills came out of that project and the face in them started as one photograph. The screenshots come from the walkthrough it was built in, which sets the interface in its own type and writes notes over it — so where a label in a picture and the text below it disagree, the text is the one describing your screen.
Step 1 — Set the style before you do anything else
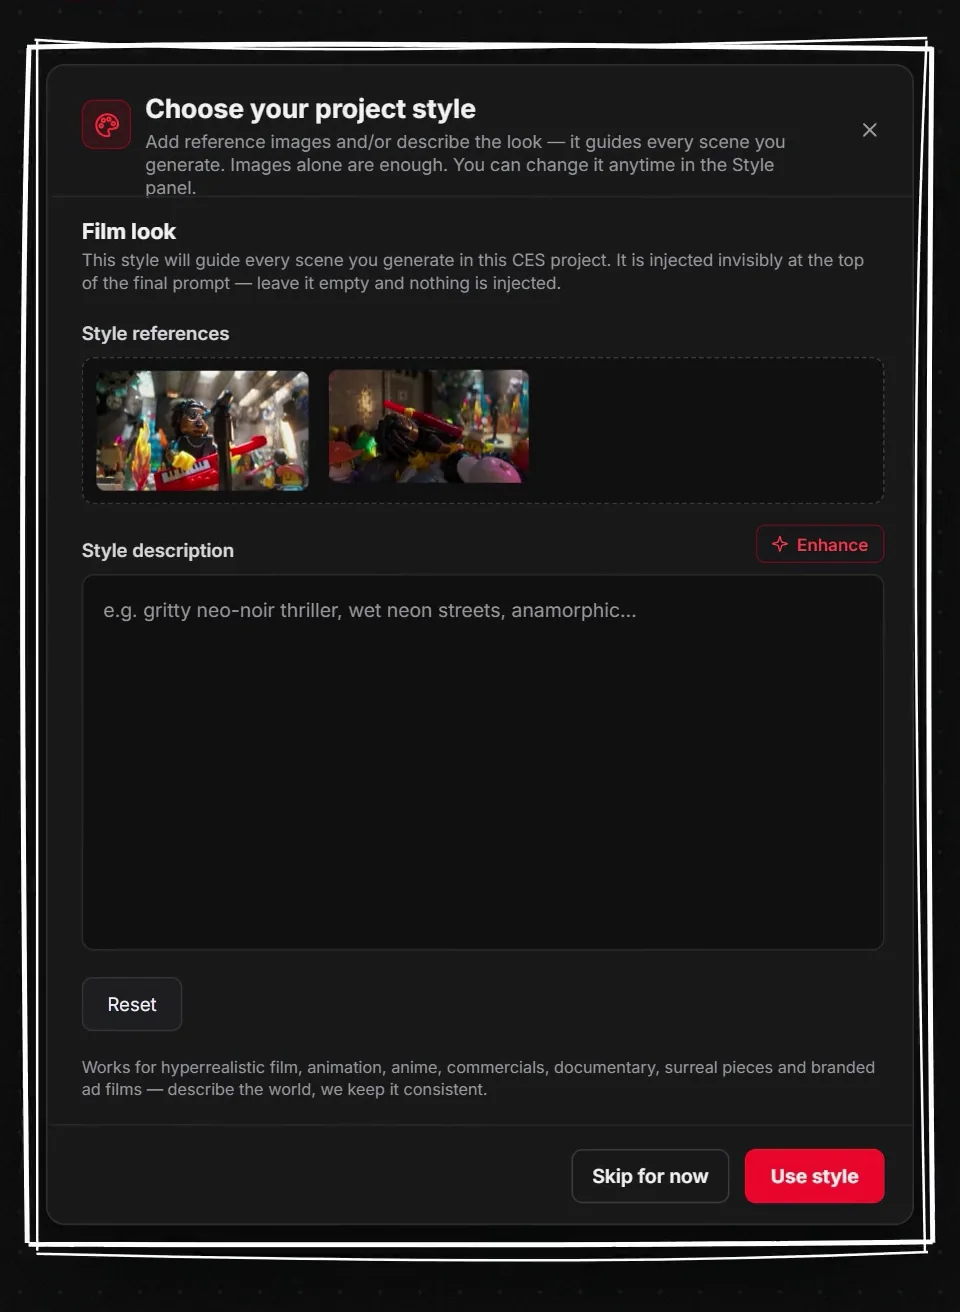
A new project asks what it should look like. In every other genre you can answer it later. Here you cannot, and the reason is worth understanding rather than memorising.
The style you set is injected invisibly at the top of the final prompt for every scene in the project — and that includes the generation that turns your photo into an actor. Set it first and the actor is *born* as a minifigure. Set it after, and you have a photoreal person that every brick-world prompt then has to argue with.
So: style first, face second. The order is the whole trick.
You can change it later — but not for free
The panel tells you the style can be changed anytime from the Style panel, and that is true. What it cannot do is go back and re-make the actors you already built under the old look. Changing the style changes what happens next, not what already happened.
Step 2 — Show the look instead of describing it
The modal takes reference images and/or a description, and it is explicit that images alone are enough. For this style, that is not a convenience — it is the better answer.
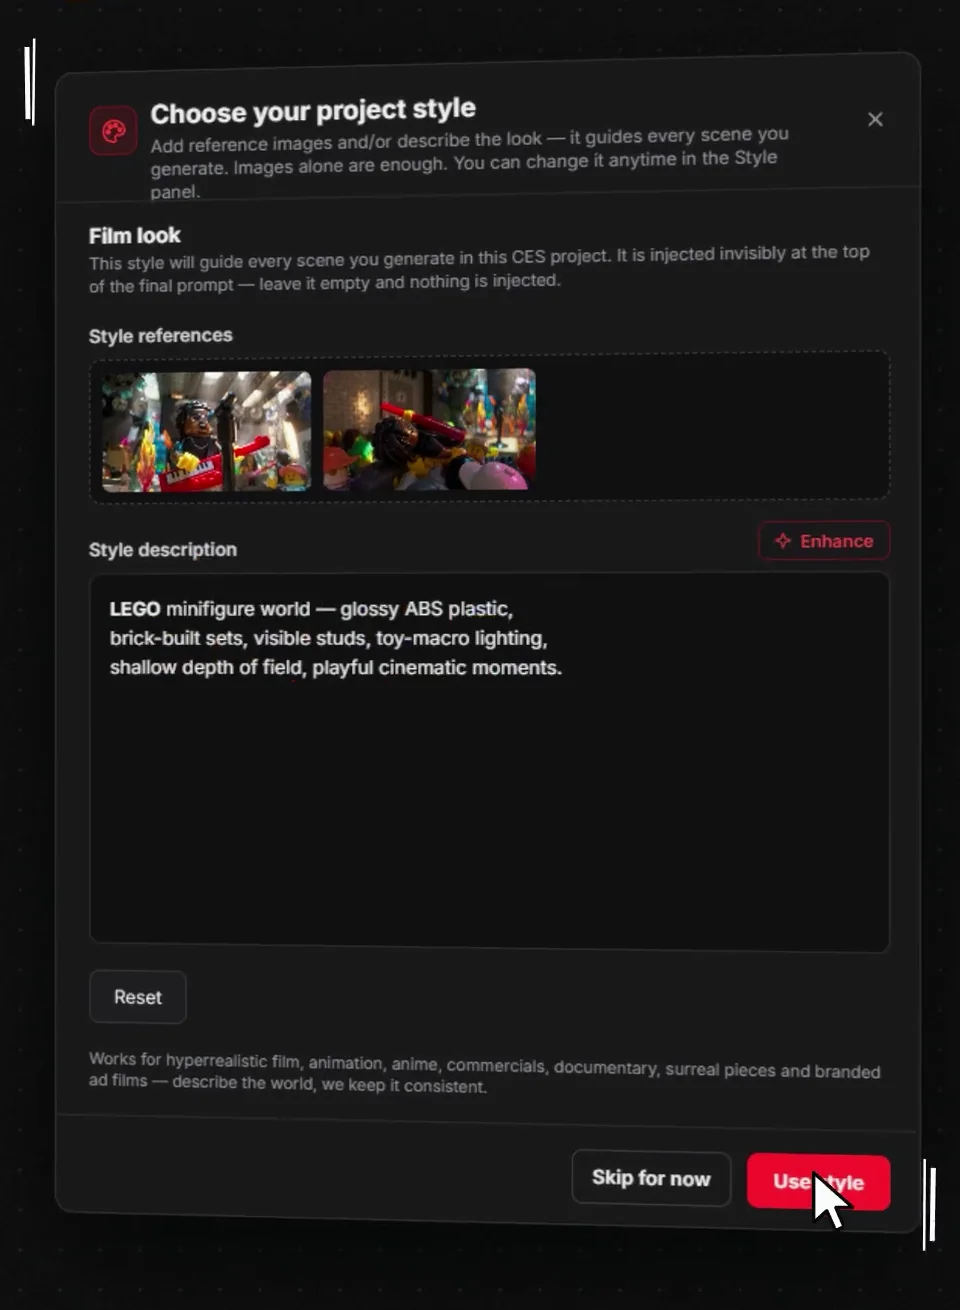
Plastic is extremely hard to write and extremely easy to show. A couple of frames of brick-built sets carry the sheen, the stud spacing, the moulded hand shape and the macro falloff in one pass, and none of those survive being turned into adjectives. Drop the images in, and the button reads Analyzing images… while it works out what you handed it.
If you want to write it as well, this is the description that produced everything on this page:
LEGO minifigure world — glossy ABS plastic, brick-built sets, visible studs, toy-macro lighting, shallow depth of field, playful cinematic moments.
What each half of that line is doing
Glossy ABS plastic is the material, and it is the word doing the most work — it is what stops the render drifting toward clay or resin. Brick-built sets makes the world out of the same parts as the characters, so the stage is plastic too. Visible studs keeps the surface honest. Toy-macro lighting and shallow depth of field are the camera, not the subject: shooting small things close is what makes them read as *objects on a table* rather than as a cartoon.
Drop the last clause and you get accurate bricks that feel like a render. Keep it and they feel photographed.
Step 3 — Upload a face into the world you just built
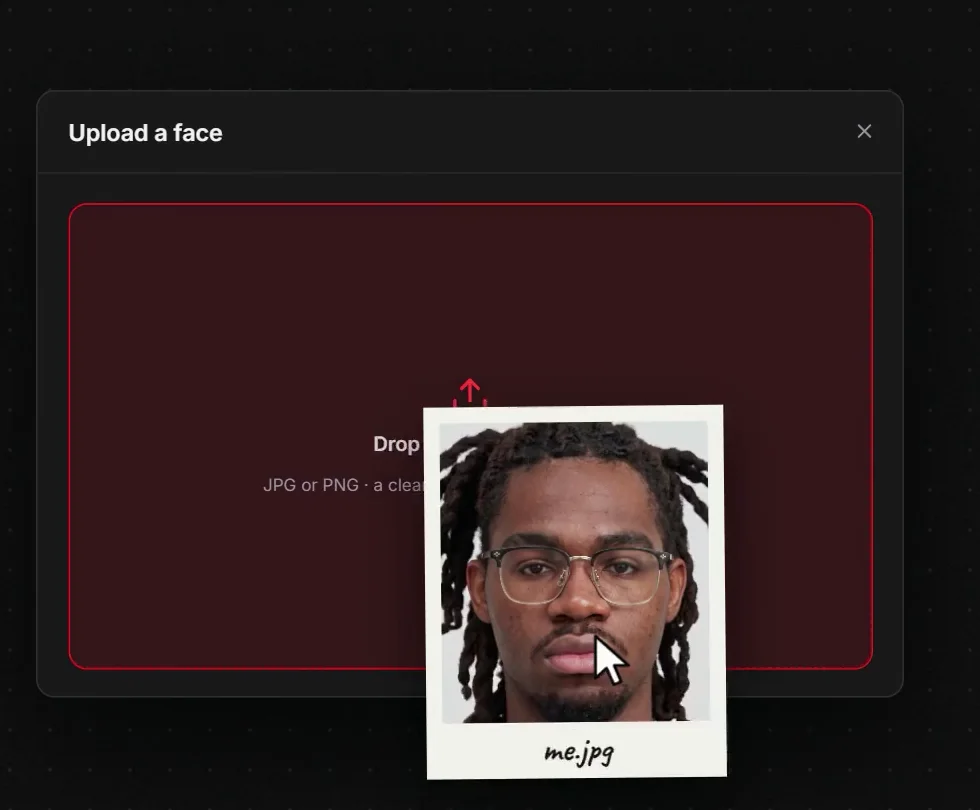
Now the actor. In the Cast panel, Create actor opens the dialog with two ways in; take Upload a face and give it one clear, front-facing photo.
You are not asking for a plastic version of the picture. You are asking for an actor in a project whose style already says plastic, which is why the same upload that gives you a person in any other project gives you a minifigure here.
Step 4 — Check the sheet before you shoot anything
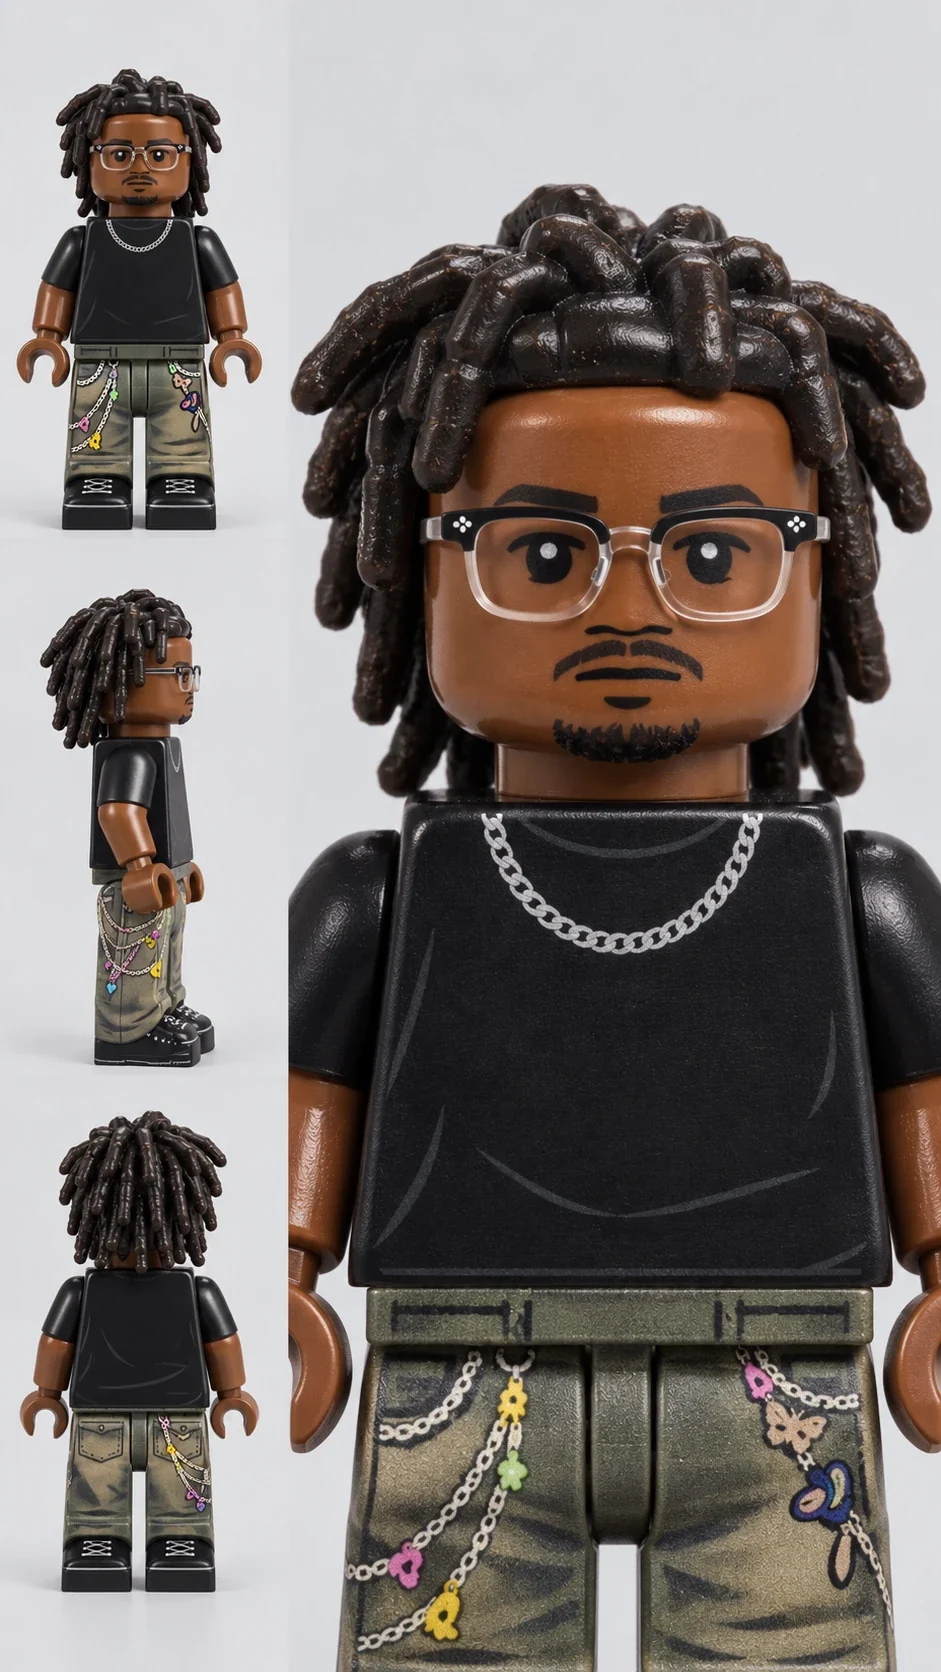
What comes back is a full character sheet: front, side, back, and a close portrait. This is the reference every later scene is measured against.
Read it as a toy, not as a portrait. The things that carry a brick character across shots are the ones a photograph never showed — the moulded hair piece from behind, the printed torso, the chain, the legs. If the back of the head is wrong here it is wrong in every shot where your character walks away, and rebuilding now costs one generation.
Step 5 — Direct one scene as physical action
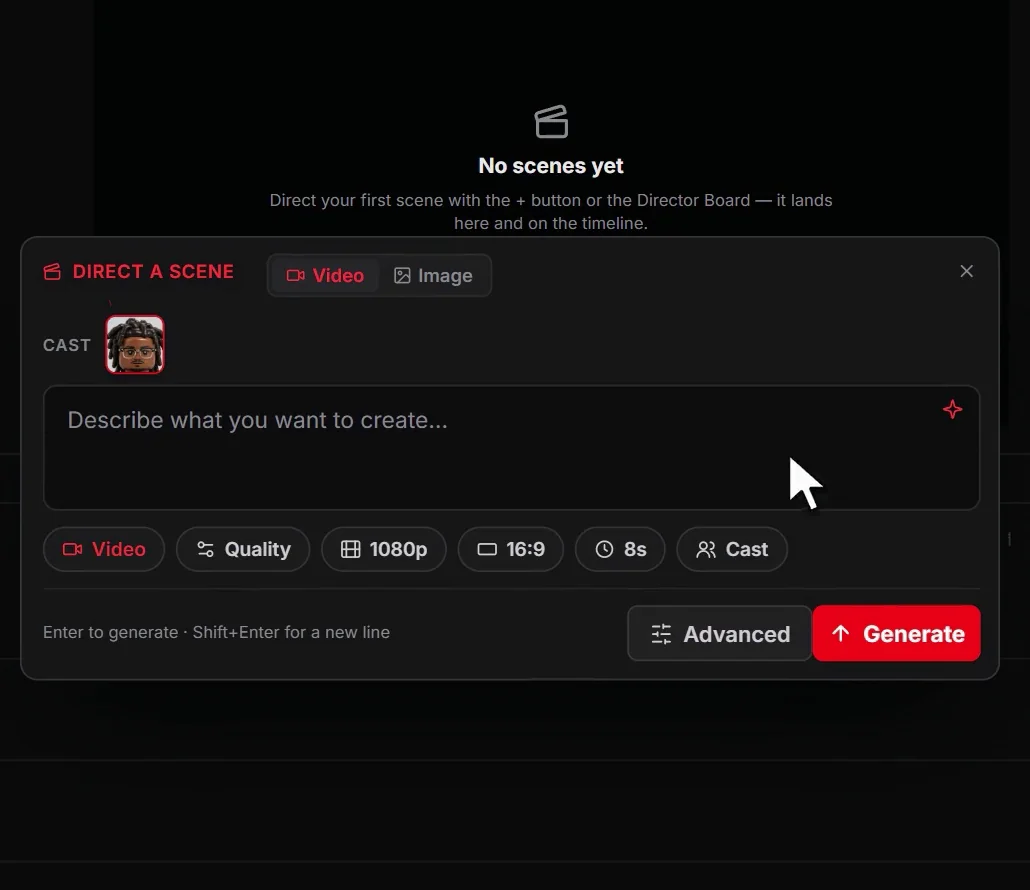
An empty project says No scenes yet and tells you to direct your first scene with the + button or the Director Board.
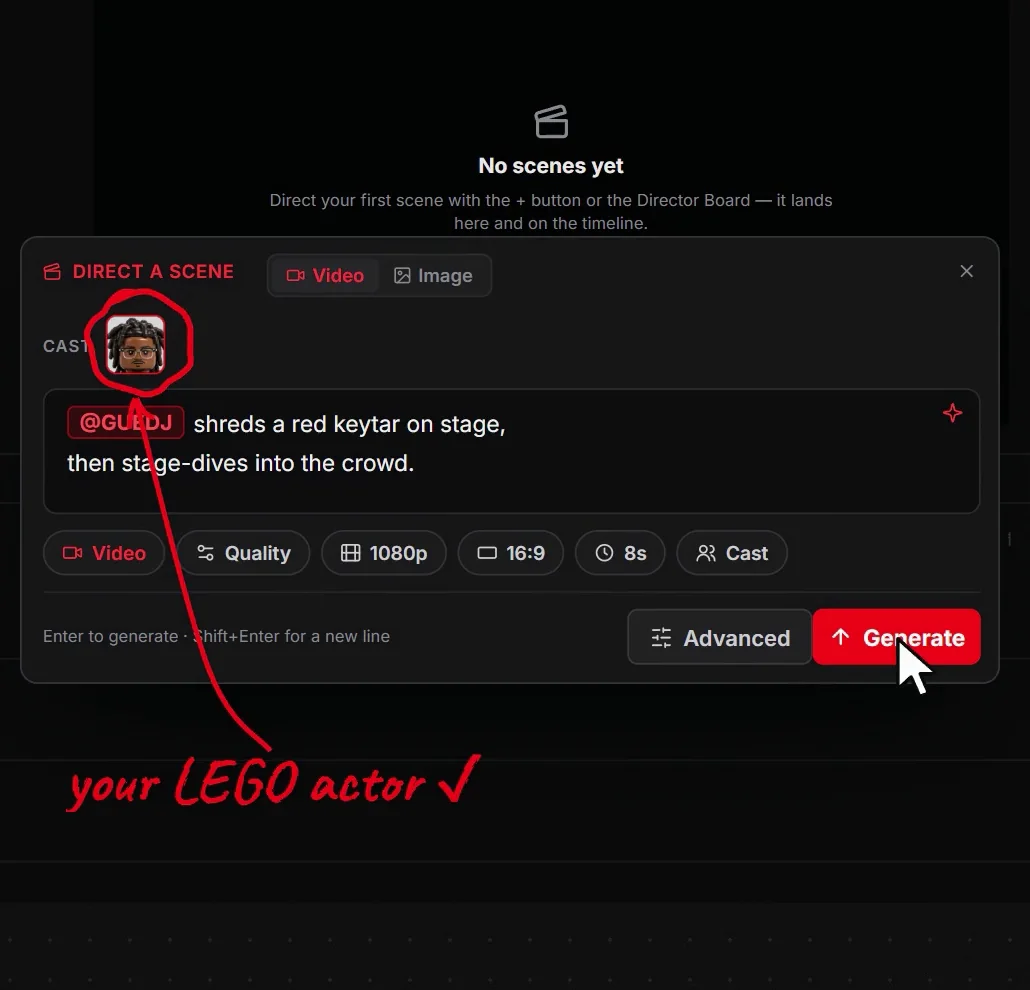
In the scene bar — the one that opens from the + button — @mention your actor so the cast chip goes in, then write what happens — nothing about plastic, nothing about studs, nothing about the lighting. All of that is already being injected above your line. Repeating it here only fights the style you set.
The scene on this page was one sentence:
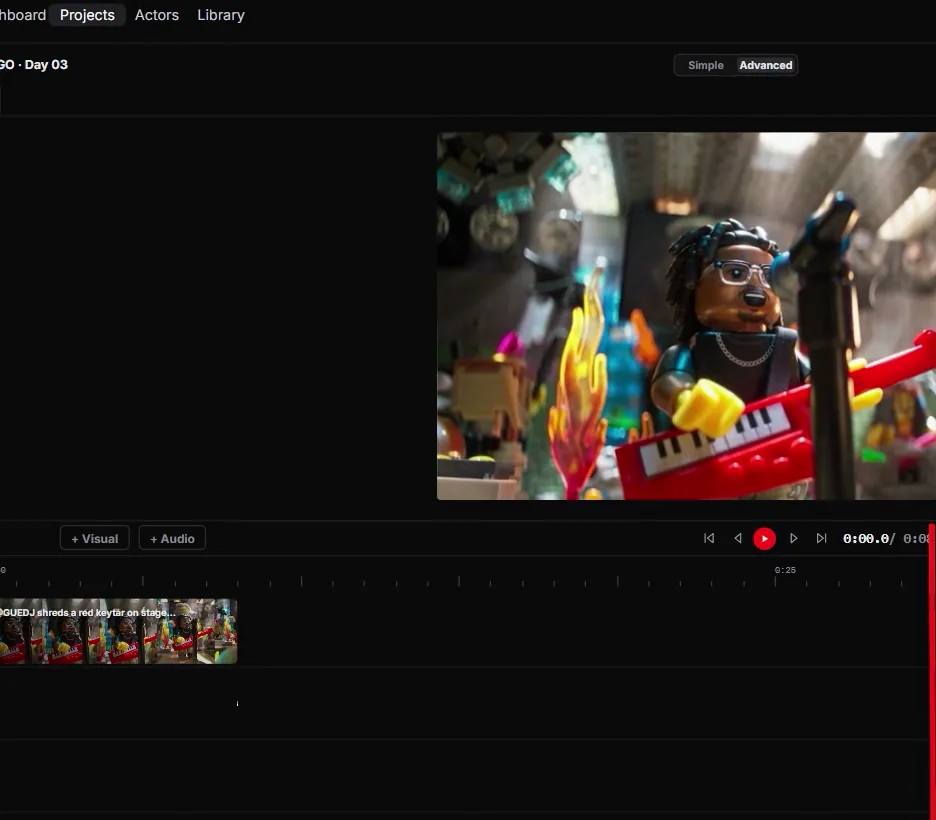
@GUEDJ shreds a red keytar on stage, then stage-dives into the crowd.
Two actions beat one adjective
Shreds and stage-dives are two physical events with an order. That is a scene. Adding *energetic, fun, colourful* would add nothing a camera can point at, and would spend words the model uses better on movement.
Brick characters have a particular advantage here: their faces barely move, so everything has to be carried by body and staging — which happens to be exactly what generation is best at.
Step 6 — Generate, and judge it against the sheet
The scene lands in the preview and drops onto the timeline as a clip you can play and trim.
Judge it against the character sheet, not against the prompt. Is that the same minifigure? Do the hands still read as moulded C-shapes rather than fingers? Is the set built from the same parts as the characters? Keep what holds and regenerate what does not.
Step 7 — Run the timeline past one generation
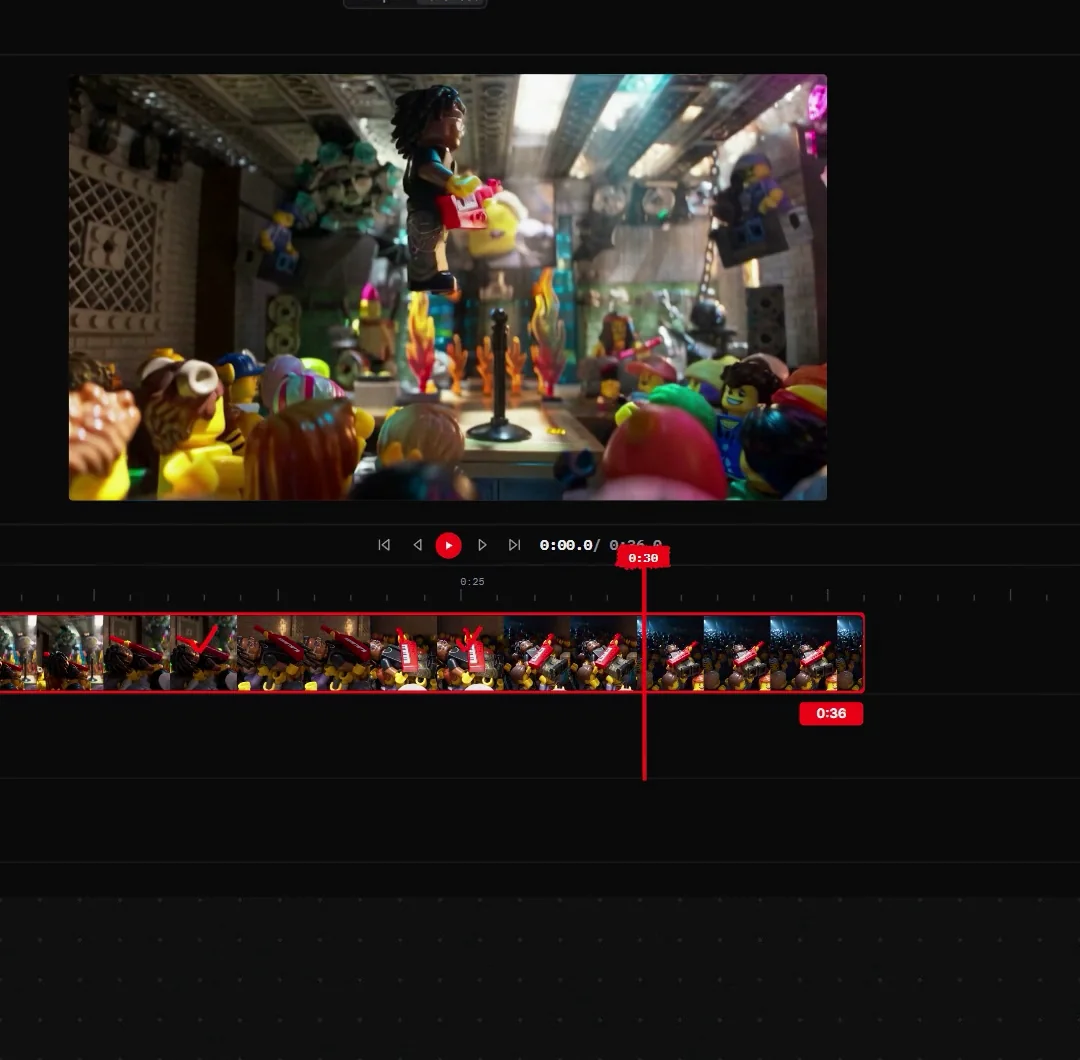
This is where an eight-second gag becomes a thirty-six-second scene — those are this build's own numbers, off the transport readout in the shot below — and it is worth being precise about how, because the shortcut version of this claim is wrong.
One generation is capped. Fast and Quality render up to 15 seconds; Performance up to 30. Nothing produces a minute in a single pass.
What gets you past that is the Director Board: drag a clip's edge and a hatched zone opens with a running duration, and letting go hands that length to a new generation that continues from the previous shot's last frame. Each stretch pre-fills up to 15 seconds, so a long timeline is a chain of continuations — which is also why the character and the set survive across it, because every link is seeded by the frame before it.
Stretch from movement
A continuation inherits the last frame, so what that frame is doing decides how the join reads. Stretch from a frame mid-action — mid-jump, crowd still moving, arm still travelling — and it carries. Stretch from a frame where everything has settled and the next link has nothing to continue from.
Step 8 — What plastic forgives, and what it exposes
Every style trades one set of problems for another, and this one trades unusually well.
Forgiven: faces. A minifigure face is a printed decal that does not emote, so the uncanny-valley problem this medium usually has simply does not arise. Skin, hair and eyes — three of the hardest things to generate — are moulded plastic here.
Exposed: hands and scale. Brick hands are a specific moulded shape and a render that gives them fingers is instantly wrong. Stud spacing has to stay consistent between shots or the world changes size. And crowds of minifigures drift the same way crowds of people do.
So: write close, keep the cast small, and let the sets be built rather than sculpted.
Step 9 — Cut it like the toy it is
Assemble the approved clips, trim hard, and lean into what the medium already looks like: short shots, clear staging, a joke or a beat per cut.
Brick films are funny because they are *small* — the pleasure is recognising something enormous rendered in a toy. Ending a shot a beat early is what keeps that feeling. Hold too long and the audience stops seeing a toy and starts inspecting a render.
Limitations & common mistakes
- Set the style before building actors — changing it later does not re-make the actors you already generated under the old look.
- Only upload a face you own or have permission to use.
- Moulded hands and consistent stud scale are where brick renders break; keep shots close and the cast small.
- One generation renders up to 15s on Fast and Quality and 30s on Performance — a longer scene is chained continuations, and each one costs a generation.
- This is a look, not a licensed product. The brand name appears here only to describe that look — in the style line you can copy, and nowhere as a claim: nothing on this page is affiliated with, authorised by or endorsed by the company that makes the bricks.
Frequently asked questions
How do you make a LEGO-style AI video?
Set the project style first, using reference images of brick-built sets — the panel accepts images alone. The style is injected at the top of every prompt in that project, so every actor and every scene is generated inside the look rather than converted into it afterwards.
Should you use reference images or a description?
For a plastic look, images. Sheen, stud spacing, moulded hand shape and macro falloff are all things a photograph carries and adjectives lose. The panel says images alone are enough, and a written description is an optional extra rather than a requirement.
Can you turn your own face into a minifigure?
Yes — upload one clear, front-facing photo through Create actor in the Cast panel, in a project whose style is already set to the brick look. The style is applied to that generation too, so the actor comes back as a minifigure with a full character sheet.
How long can one AI generation be?
Up to 15 seconds on the Fast and Quality profiles and up to 30 on Performance. Anything longer is built by chaining: stretch the clip on the Director Board and each continuation generates from the previous shot's last frame, which is also what keeps the character and set consistent across the join.
Why does the order of style and actor matter?
Because the project style is injected into the prompt that builds the actor. Set the style first and the actor is generated as a minifigure. Set it afterwards and you have a photoreal actor that every later brick-world prompt has to work against.
Written by
Adkeet Team · AI Creative StudioThe Adkeet team builds AI filmmaking and advertising tools — the Actor Creator and the Cinematic Engine Studio. These guides come from workflows we run inside the product every day.
Related tutorials
Make your brick short
Set the look first, then meet the minifigure version of yourself.